C Purlin vs Z Purlin:
Which Should You Specify?
Both are cold-formed from galvanised coil and both are priced by weight. The difference in section shape decides your span, your steel tonnage and your fixing detail.
Every steel structure warehouse, factory or poultry house drawing review reaches the same question: should the roof purlins be C sections or Z sections? The answer is not a matter of preference — it follows directly from your span, your bay spacing and your load case. This guide sets out the practical differences and gives a simple rule for choosing.
What is a C purlin?
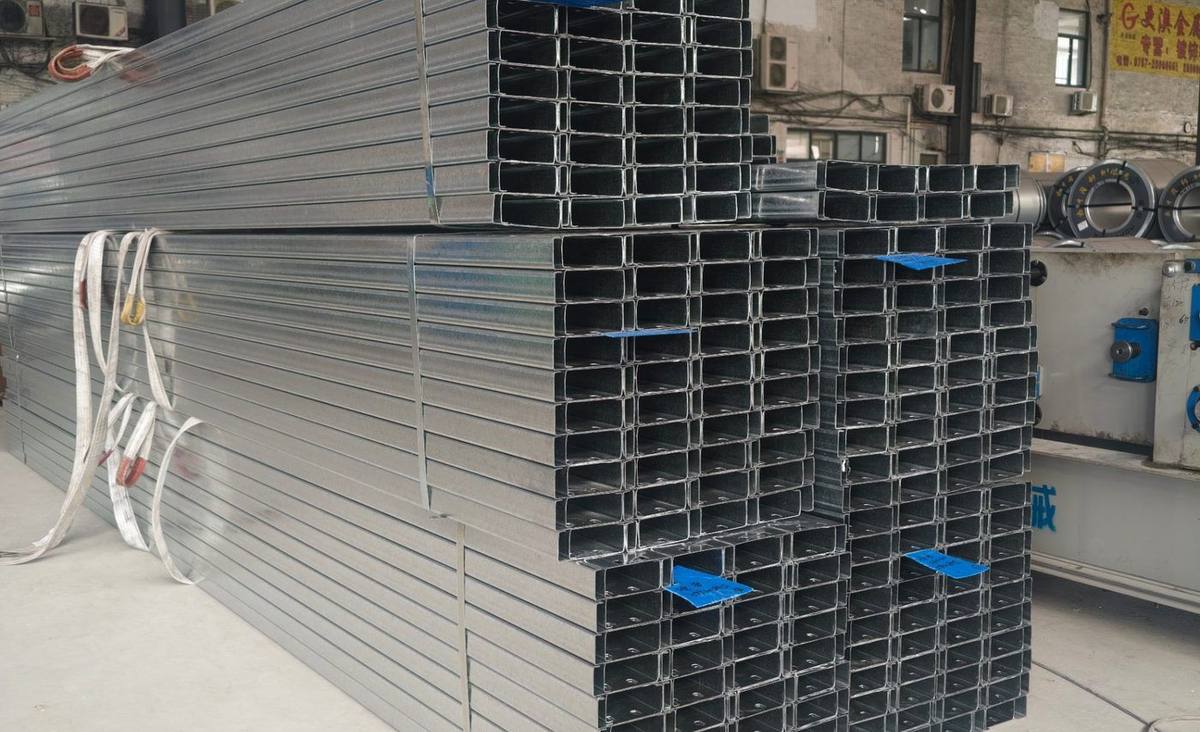
A C purlin (also called a Cee, or C section) has a rectangular C profile with two equal flanges. It is roll-formed from galvanised steel strip, usually 1.5 mm to 3.0 mm thick, in depths from about 80 mm to 350 mm. Because the two flanges are identical, a C section is symmetrical: it is easy to stack, easy to nest for shipping, and simple to bolt or screw through the web.
That simplicity makes it the default for wall girts, eave members, edge purlins and short-span roof purlins. Two C sections usually butt together at a support with a cleat, so each span behaves independently.
What is a Z purlin?
A Z purlin has a Z-shaped profile with unequal flanges — one flange turns up, the other turns down. That asymmetry has one purpose: it lets adjacent Z purlins nest into each other and overlap at the supports. The overlap turns a row of independent simply-supported spans into a continuous beam.
Continuity is the whole point. Over an internal support, the bending moment reverses, so the lapped section shares the load between two members. The result is that a Z purlin of the same steel weight can carry a longer span than a C purlin — and on long runs, the saving in tonnage is real.
The four practical differences
| Item | C purlin | Z purlin |
|---|---|---|
| Section | Symmetrical C, equal flanges | Asymmetrical Z, unequal flanges |
| Joint at support | Butt joint with cleat | Nests and laps — continuous beam |
| Best span | Up to about 6 m, single span | 6–12 m with lapping |
| Typical use | Wall girts, eaves, edge purlins, short roof spans | Long-span roof runs, multi-bay buildings |
| Installation | Simple — no lap detailing | Needs lap length, stitch screws and correct overlap sequence |
| Steel efficiency | Good on short spans | Better on long spans — less tonnage per m² |
Indicative span guidance
The table below is a starting point for early-stage estimating. It assumes a typical light roof (single skin or insulated panel), Q355 steel and normal wind loading.
| Section | Depth | Thickness | Purlin spacing | Indicative clear span |
|---|---|---|---|---|
| C | 120 mm | 2.0 mm | 1.2 m | 4.5 – 5.5 m |
| C | 160 mm | 2.0 mm | 1.2 m | 5.5 – 6.5 m |
| C | 200 mm | 2.5 mm | 1.5 m | 6.0 – 7.0 m |
| Z | 150 mm | 2.0 mm | 1.2 m | 7.0 – 8.0 m (with lapping) |
| Z | 200 mm | 2.5 mm | 1.5 m | 9.0 – 10.5 m (with lapping) |
| Z | 250 mm | 2.5 mm | 1.5 m | 10.0 – 12.0 m (with lapping) |
Indicative only. Final sections must be verified by a structural engineer against your actual wind, snow and seismic loads, and against deflection limits — not just bending capacity.
How to choose — a simple rule
- Span under about 6 m, single span → C purlin. Lapping saves nothing here.
- Span over 6 m, or three or more bays → Z purlin with lapping. This is where the steel saving appears.
- Wall girts and eave members → C purlin. Fixing is simpler and there is no lap to detail.
- Long continuous roof runs → Z purlin. Continuity across every internal support.
- Mixed buildings → Z purlins on the roof, C purlins on walls. This is the most common arrangement we ship.
What to send with your enquiry
To get a purlin schedule and price back quickly, send us:
- Building length, width and eave height
- Purlin spacing (or ask us to propose one)
- Roof and wall cladding type and weight per m²
- Wind load, snow load or the project location so we can apply the right code
- Any crane, mezzanine or ceiling loads
- Quantity — either a schedule or a total tonnage
Frequently asked questions
Yes, and it is common practice. Use Z sections where the roof run is long enough for lapping to pay off, and C sections for wall girts and eave members where a simple butt connection is cheaper and faster to install.
1.2 m to 1.5 m is normal for standard roofing sheets and insulated panels. Thinner sheets, heavy snow zones or fragile cladding need closer spacing, which is one reason we ask for the cladding type before quoting.
On spans over 6 m, yes. Lapping creates continuity that raises capacity per kilogram, so a lighter Z section can replace a heavier C section. On short single spans the benefit is small and C sections are usually the better buy.
Q235 or Q355 (S235 / S355) with Z275 galvanised coating is standard for export. Coastal sites, fertilizer plants and high-humidity climates should specify a heavier coating or an additional paint system, because purlins are the first members to show corrosion.
Need a purlin schedule for your building?
Send your drawings or a simple length × width × height and we will come back with a purlin schedule, tonnage and price — usually within 24 hours.
Related guides
Steel structure shipping container
Container sizes, payload limits, packing rules and a worked 1,000 m² count.
Read the guideColor steel sheet thickness: 0.5, 0.6 or 0.8 mm
Base metal vs total thickness, tolerance bands and real section properties.
Read the guideRoofing Profile Catalogue
22 profiles with the section data at every rolled thickness.
Request the catalogueTechnical FAQ
Thirteen straight answers on cost, grades, loads and export.
Read the FAQHow much does a steel building cost per m²?
The seven cost blocks behind any steel building price, and how to get an accurate quote.
Read the guideC purlin range — C80 to C250
Section properties, mass, Ix and Wx for every C section we roll, in one table.
See the C rangeZ purlin range — Z100 to Z300
Nesting Z sections, lap guidance and the full section data behind the numbers.
See the Z rangeHow to quote a steel building
The RFQ checklist, what a complete quotation must contain, and how to compare two offers.
Read the guideSandwich panel core comparison
EPS, rock wool, glass wool, PU and PIR compared on U-value and fire rating.
Read the guidePurlin span calculator
Put in your span, spacing and loads — get the lightest section that passes both checks.
Open the calculator